

Today is: Thursday May 02, 2024
This website documents how to configure and use Mentor DxDesigner and Expedition at UC Davis.
- DxDesigner Configuration : PCB Netlist Configuration.
- Expedition Configuration : Layer Templates and Color Configuration.
- UC Davis Library Maintenance : Synchronizing local Schematic and PCB libraries with UC Davis libraries.
- DxDesigner Project Creation : Setting up a new project and adding libraries.
DxDesigner Configuration:
- The "pads2007.cfg" configuration file for DxDesigner will need to be modified
before the Expedition Layout netlist is generated, so that the DxDesigner
"Create PCB Netlist" utilitiy will not error out. The following file needs to be downloaded:
Save the "pads2007.cfg" file to the following location:
- <mentor_install_drive>/MentorGraphics/2007Expedition/SDD_HOME/standard/
- <mentor_install_drive>/MentorGraphics/2007Expedition/SDD_HOME/standard/
- The "expedition.cfg" configuration file for DxDesigner will need to be modified
before the Expedition Layout netlist is generated, so that the DxDesigner
"Create PCB Netlist" utilitiy will not error out. This file is only used when using the fpganets.pl file to generate a Xilinx UCF file from the
PCB Netlist. The following file needs to be downloaded:
Save the "expedition.cfg" file to the following location:
- <mentor_install_drive>/MentorGraphics/2007Expedition/SDD_HOME/standard/
- <mentor_install_drive>/MentorGraphics/2007Expedition/SDD_HOME/standard/
Expedition Configuration:
- In order to start the layout of a board, you will need the layer template files. The following
files need to be downloaded:
Save the layer template files to the following location:
- <mentor_install_drive>/MentorGraphics/2007Expedition/SDD_HOME/settings/
- <mentor_install_drive>/MentorGraphics/2007Expedition/SDD_HOME/settings/
- The display color settings for Expedition also need to be configured using the UC Davis Color Configuration file: "ctx_config.CCF".
The following file needs to be downloaded:
Save the "ctx_config.CCF" file to the following location:
- <mentor_install_drive>/MentorGraphics/2007Expedition/SDD_HOME/settings/
- <mentor_install_drive>/MentorGraphics/2007Expedition/SDD_HOME/settings/
UC Davis Library Maintenance:
- In order to maintain good synchronization with the UC Davis Schematic and PCB Libraries you can use a
tool called rsync. A shell script has been written that allows you to quickly select the
library that needs to be udpated. The following file needs to be downloaded:
Save the lib_update_from_srfs3 shell script to the following location:
- <local_library_path>/ucd_library/
usage: ./lib_update_from_srfs3.sh [user] [dir]An example of using the lib_update_from_srfs3 shell script is shown below:
[jwwebb@tiefighter ../ucd_library] $ ./lib_update_from_srfs3.sh jwwebb pcb_layout/ rsync -avz jwwebb@srfs3:/data/share/mixsig/PCB_Libraries/pcb_layout/ ./pcb_layout/ jwwebb@srfs3's password: stty: standard input: Invalid argument receiving file list ... done sent 16 bytes received 727 bytes 212.29 bytes/sec total size is 17712913 speedup is 23839.72 - <local_library_path>/ucd_library/
- The first time you execute the script it may take several minutes to download all of the libraries, but on successive updates you'll only be downloading the files that have changed since your last synchronization.
- The PCB Library is located here:
- \\srfs3\share\mixsig\PCB_Libraries\pcb_layout\
- You need to download all libraries underneath this folder.
- The Schematic Library is located here:
- \\srfs3\share\mixsig\PCB_Libraries\schematic\
- You need to download the sch_rev2 and borders libraries underneath this folder.
DxDesigner Project Creation:
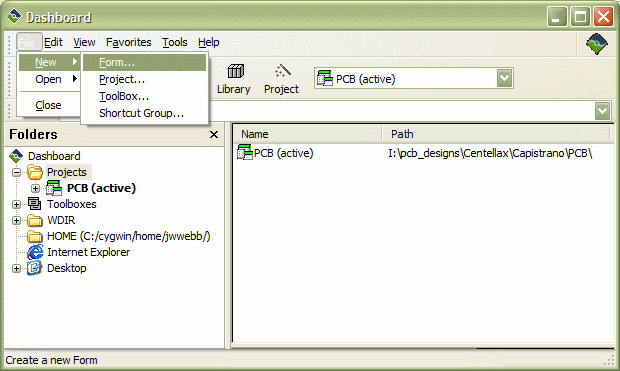
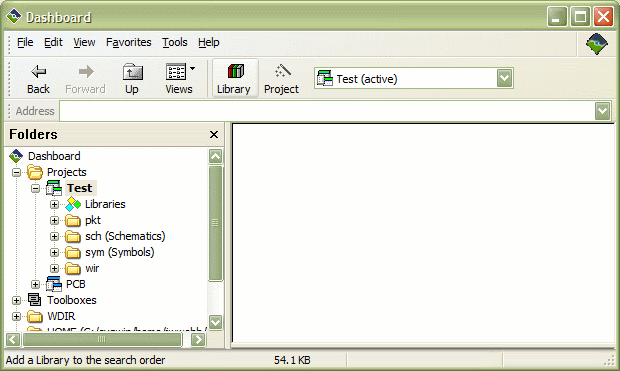
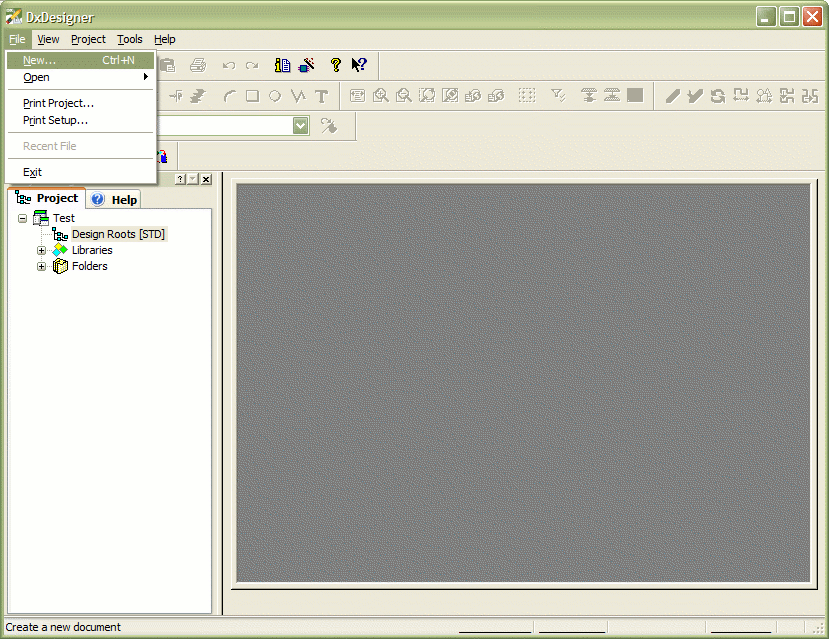
- To start a new DxDesigner Schematic Design, first double click on the "eProduct Designer 2007Expedition" icon on your desktop.
-
- The Dashboard window will open with the active project defaulting to the last active project (or none if it is
the first time you have used it since the installation).
- Select File -> New -> Project.
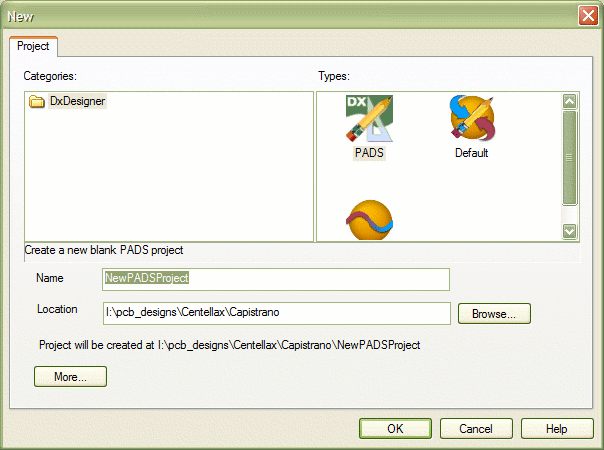
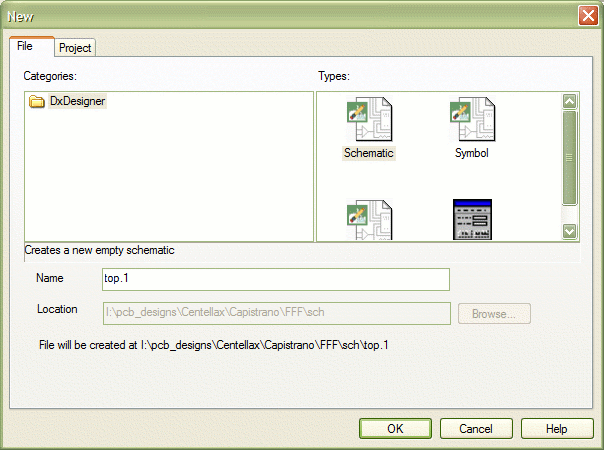
- Select a type of "Expedition", choose a project name, and choose a location to store
the schematic and layout design.
- Now, the new project is the active project. Click on the "Library"
icon in the toolbar.
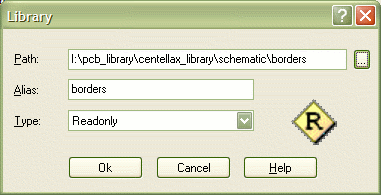
- Right-click on the "Libraries" branch in the folder view, and select "Add Library"
icon in the toolbar. Navigate to the location of your .../schematics/sch_rev2/ UC Davis library, and click "OK".
- Right-click on the "Libraries" branch in the folder view, and select "Add Library"
icon in the toolbar. Navigate to the location of your .../schematics/borders/ UC Davis library, and click "OK".
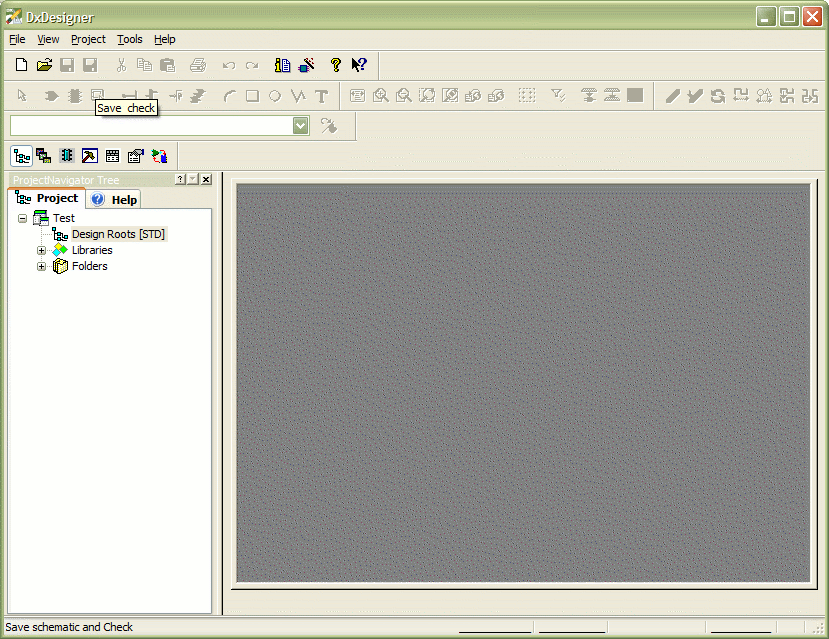
- Click on your project name branch in the folder view, then double-clock the <design.dproj> file in the folder contents view.
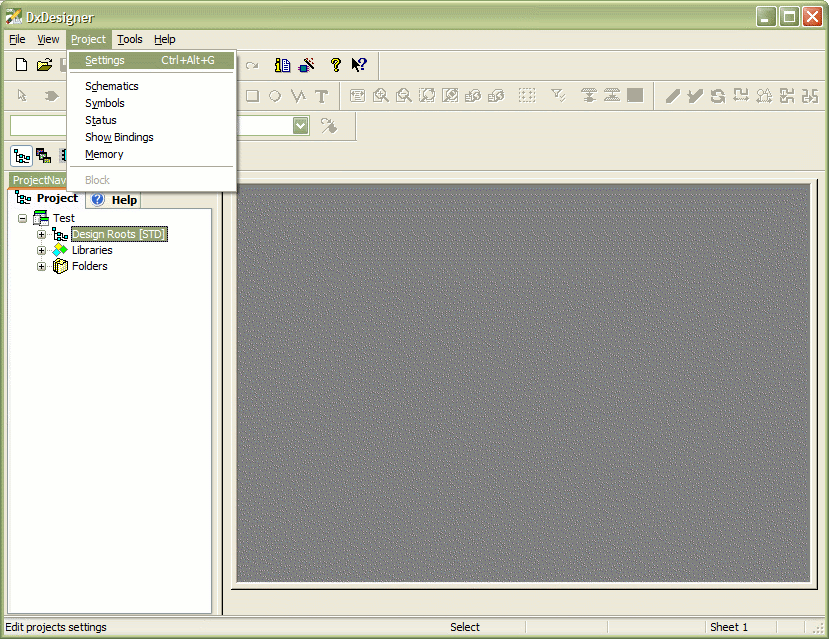
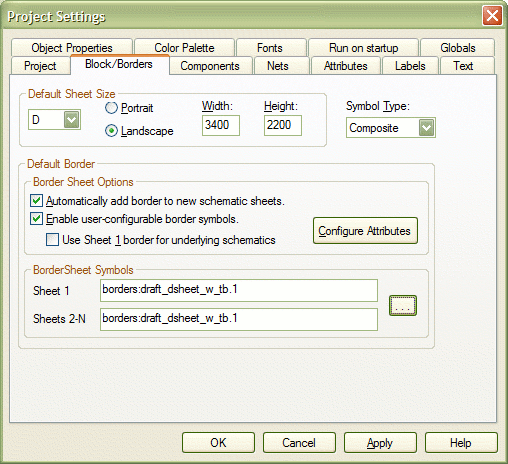
- Select Project -> Settings to add a new schematic sheet to the design.
- Select the "Block/Borders" tab. Change the "Default Sheet Size" to the desired size, and
check the following boxes:
- "Automatically add border to new schematic sheets."
- "Enable user-configurable border symbols."
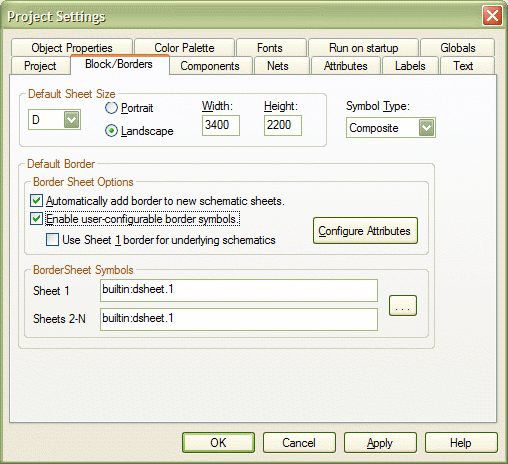
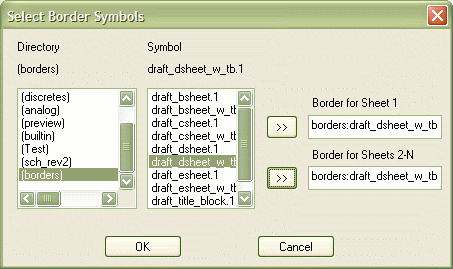
- Select the borders Directory on the left, then select the appropriate border for the
current sheet size chosen on the previous dialog box and click "OK"
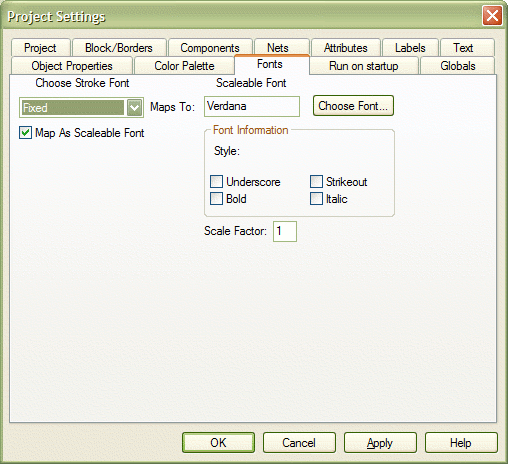
- Select the "Fonts" tab. Change the font settings to look like the following image, then click "OK".
- Select File -> New to add a new schematic sheet to the design.
- Select a type of "Schematic", choose a sheet name, then click "OK".
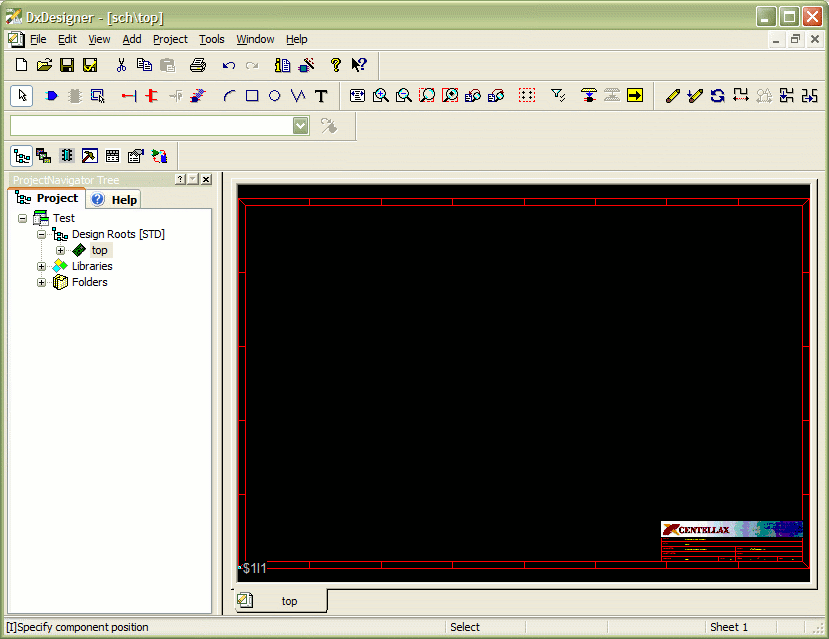
- Now you're ready to start drawing the schematics.
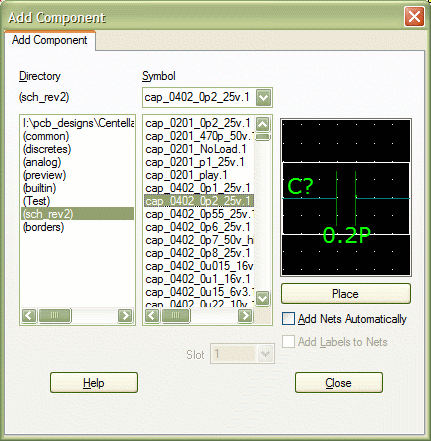
- To insert components type the "i" key, select the sch_rev2 library, then choose the component
you would like to insert into your schematic sheet.


Jeremy W. Webb

Last Modified: Wednesday, March 18, 2015 09:45:35 AM